
文章的第一节转载自原文连接
本文实现了服务器ubuntu18.04和虚拟机ubuntu20.04两个版本的MySQL8 的安装,和navicat的连接。其中ubuntu18.04对应第二节,ubuntu20.04是ubuntu focal的,对应第三节。
1. 彻底删除mysql5.7
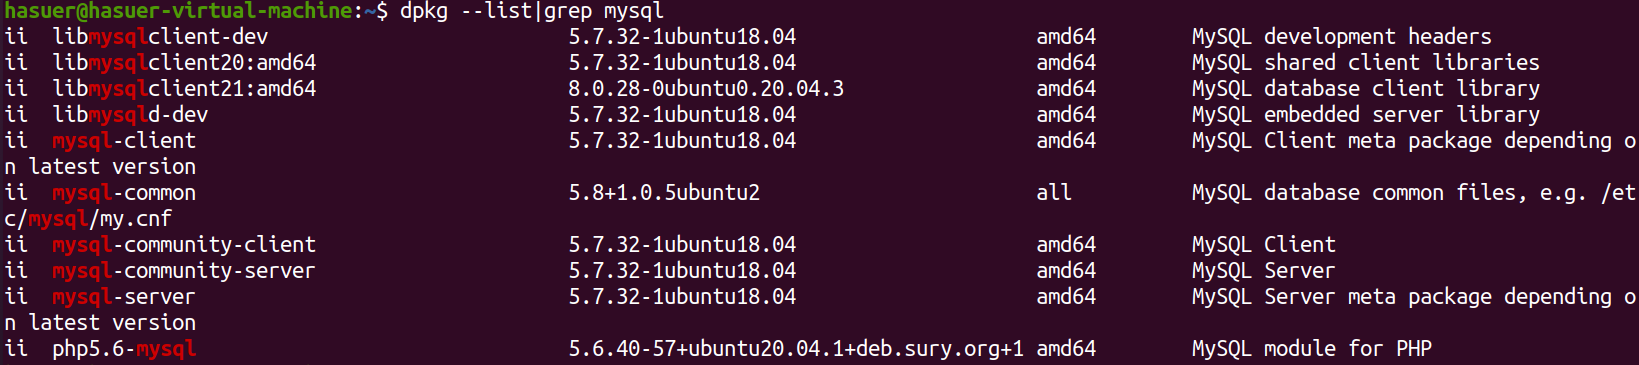
1.1 查看mysql的依赖项
1 | dpkg --list|grep mysql |
1.2 卸载
1 | sudo apt-get remove mysql-common |
在卸载过程中输入yes
1.3 卸载(最后的版本数字根据自己具体的版本进行相应的修改)
1 | sudo apt-get autoremove --purge mysql-server-5.7 |
1.4 清除残留数据
1 | dpkg -l|grep ^rc|awk '{print$2}'|sudo xargs dpkg -P |
出现下图界面,选择<YES>

1.5 再次查看依赖
1 | dpkg --list|grep mysql |
发现有如下残留

使用命令sudo apt-get autoremove --purge xxxx来卸载:
1 | sudo apt-get autoremove --purge php5.6-mysql |
执行之后再次使用命令查看:
1 | dpkg --list|grep mysql |
输入命令之后没有任何返回即成功,这里输入了两次:

2. 服务器(ubuntu18.04)安装MySQL8
2.1 使用命令下载存储库软件包
1 | wget -c https://dev.mysql.com/get/mysql-apt-config_0.8.10-1_all.deb |
2.2 使用命令安装上边下载的安装包
1 | sudo dpkg -i mysql-apt-config_0.8.10-1_all.deb |
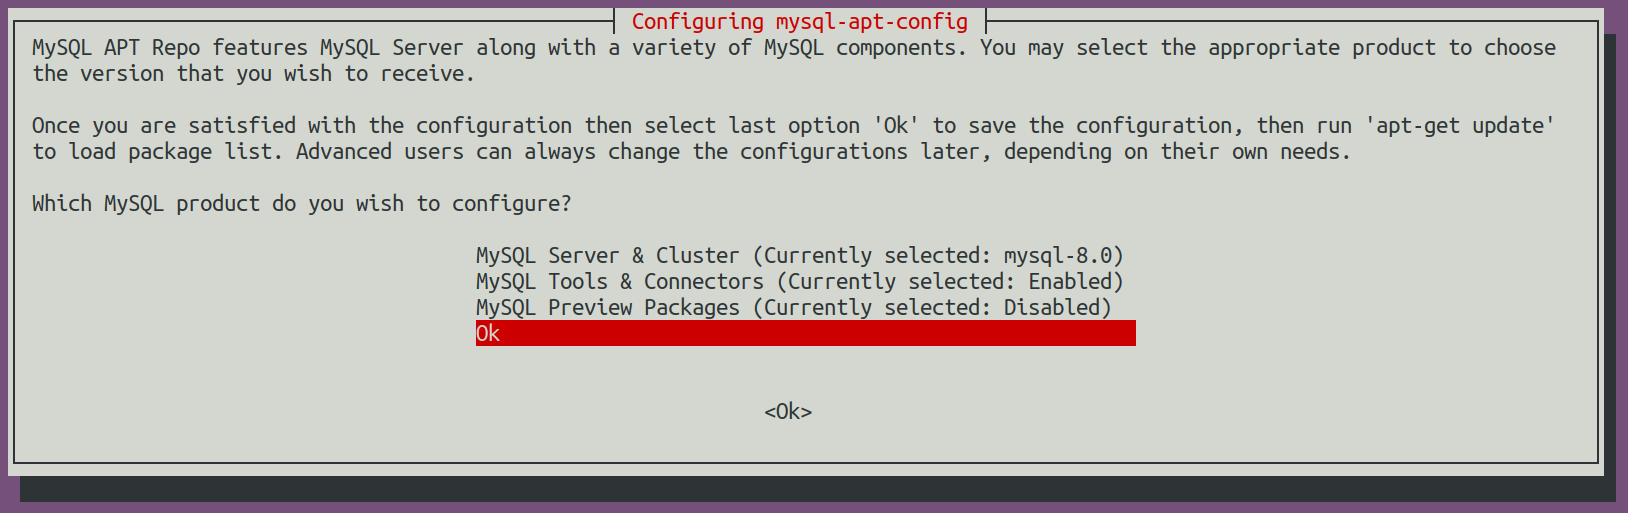
安装过程中提示选择安装版本,默认安装的就是8.0版本,所以直接选择“OK”确认即可;
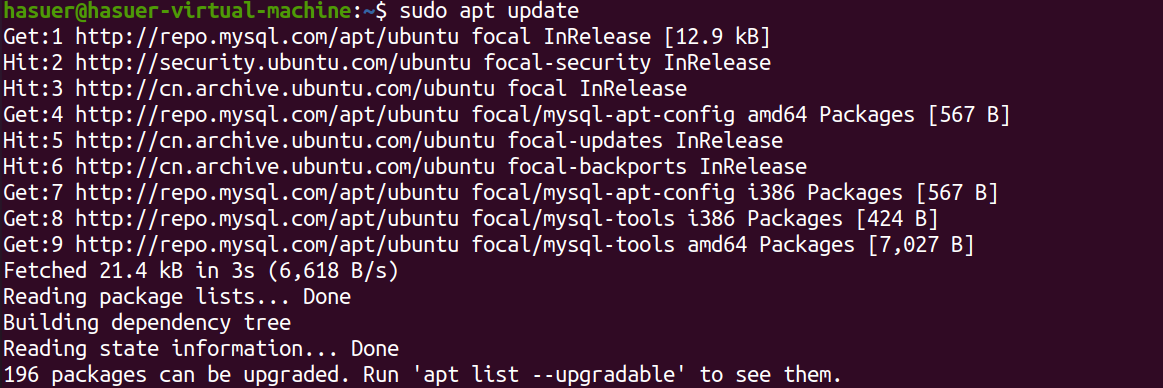
2.3 从所有已配置的存储库(包括新添加的 MySQL 8存储库)中下载最新的软件包信息:
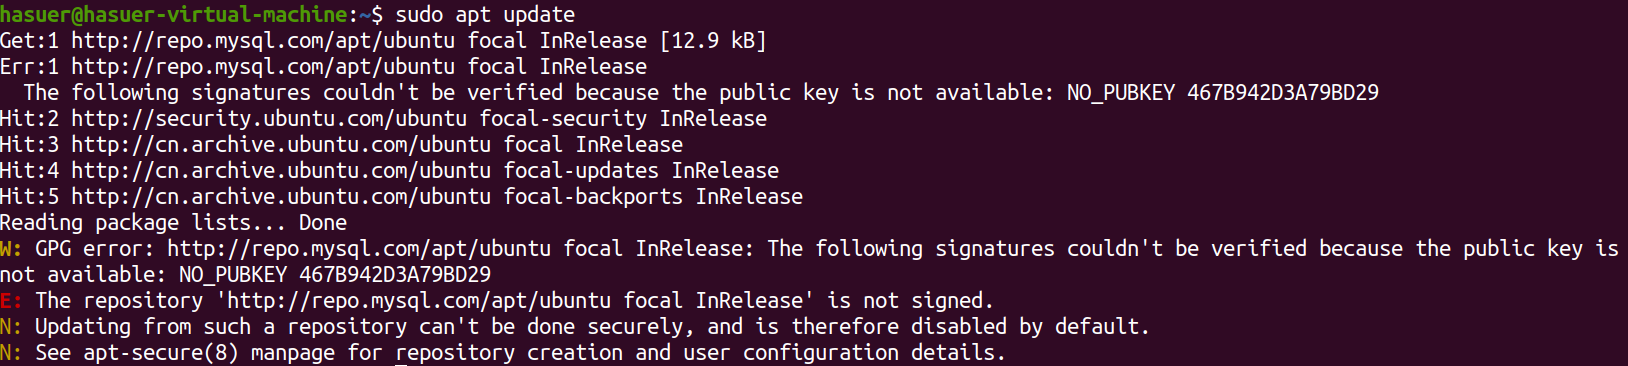
1 | sudo apt update |
可能的报错:
解决:
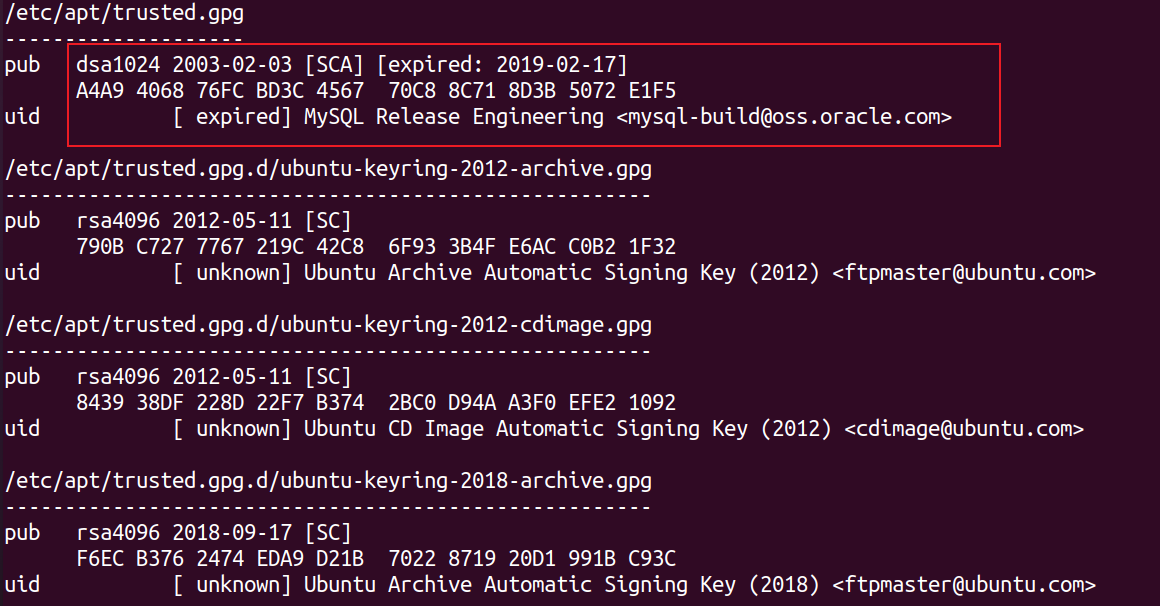
查看签名列表:
删除过期的签名;(del 后跟上条指令查到的pub)
重新添加新的签名
GPG error: http://repo.mysql.com/apt/ubuntu focal InRelease: The following signatures couldn’t be verified because the public key is not available: NO_PUBKEY 467B942D3A79BD29
之后继续执行更新命令:

2.4 安装MySQL8
1 | sudo apt install mysql-server |
安装过程中会提示设置root密码。按照提示输入即可;
输入之后会出现选择加密方式的提示界面,我在网上的教程中看到默认的mysql8.0的加密方式与ubuntu18.04 及以上不兼容,所以选择5.x的加密方式;建议选择下边的那个:
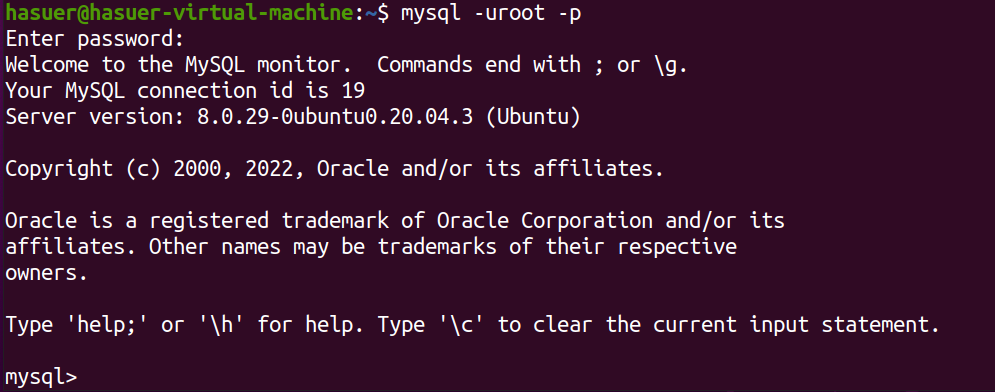
2.5 验证
1 | mysql -uroot -p |
[图片]
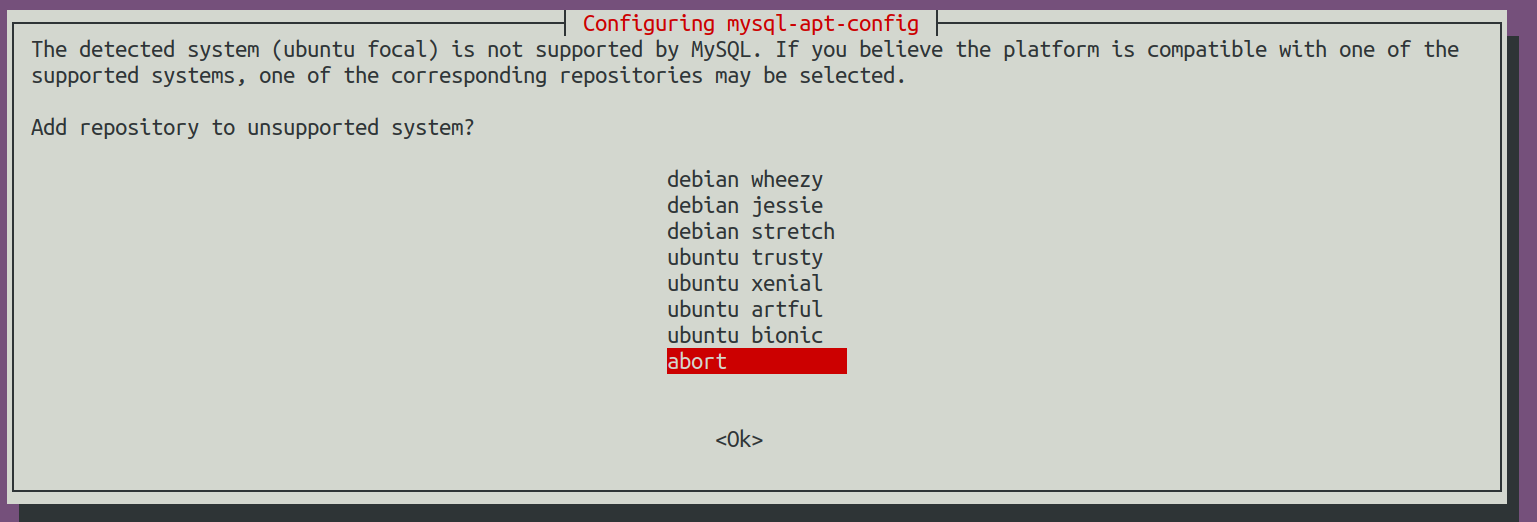
3. 在Ubuntu 20.04 LTS Focal Fossa上安装MySQL8
在上一节中,执行命令sudo dpkg -i mysql-apt-config_0.8.10-1_all.deb的时候提示这是ubuntu focal系统,这里根据教程来安装。
Step 1: Update the system to the latest
1 | sudo apt update |
Step 2: Install MySQL on Ubuntu 20.04
1 | sudo apt install mysql-server |
Step 3: Secure MySQL installation\
1 | sudo mysql_secure_installation |
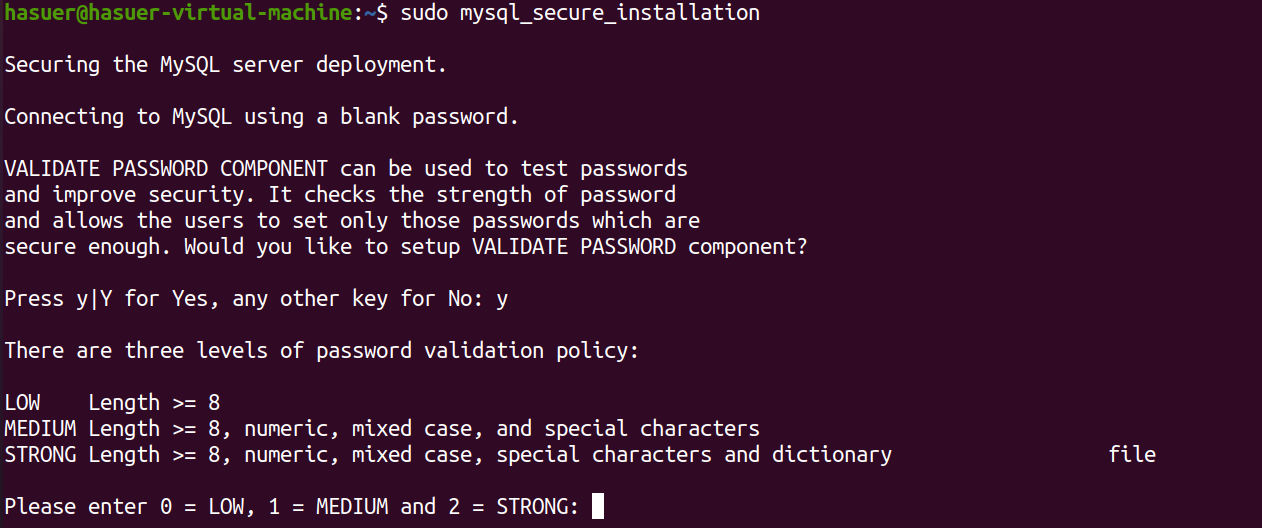
可能的问题:
设置完密码之后按照要求”Do you wish to continue with the password provided?”输入yes报错如下:
[MySQL Failed! Error: SET PASSWORD has no significance for user ‘root’@’localhost’ as the authentication method used doesn’t store authentication data in the MySQL server. Please consider using ALTER USER](https://www.nixcraft.com/t/mysql-failed-error-set-password-has-no-significance-for-user-root-localhost-as-the-authentication-method-used-doesnt-store-authentication-data-in-the-mysql-server-please-consider-using-alter-user/4233)解决:
- Open the terminal application.
- Terminate the
mysql_secure_installationfrom another terminal using thekillall command:sudo killall -9 mysql_secure_installation- Start the mysql client:
sudo mysql- Run the following SQL query:
2
exit
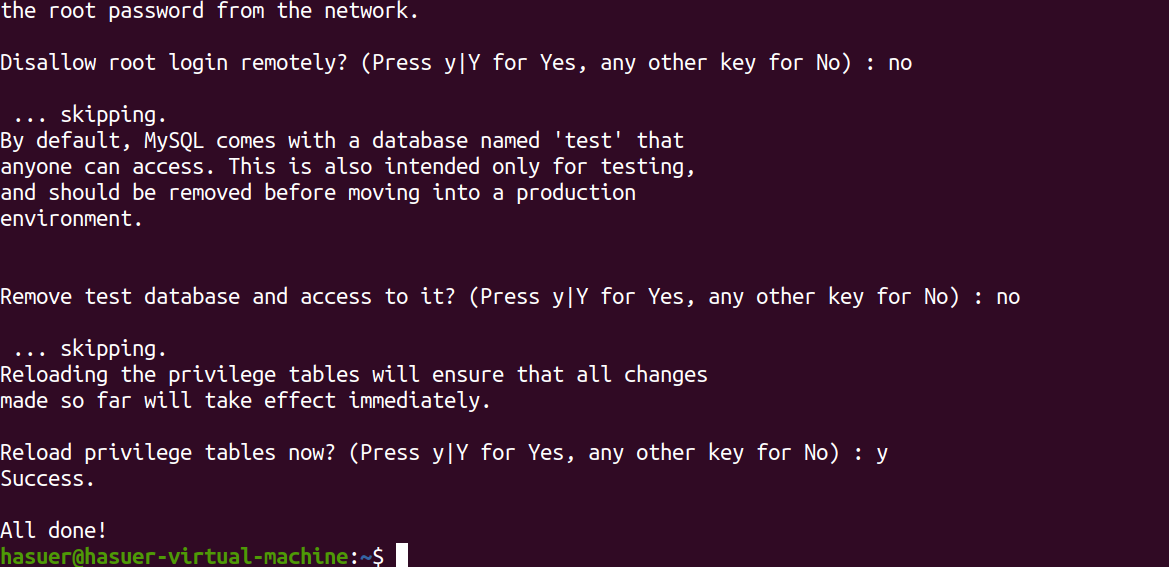
Then run the following command to secure it:
sudo mysql_secure_installationWhen promoted for the password enter the
SetRootPasswordHere(or whatever you set when you ran the above SQL query)That is all.
成功界面如下:
Step 4: Test MySQL Community Server service
1 | systemctl status mysql.service |

1 | mysql -uroot -p |
4. navicat 连接
4.1 连接报错1103
[图片]
原因:帐号不允许从远程登陆,只能在localhost。这个时候只要在localhost的那台电脑,登入mysql后,更改”mysql” 数据库里的 “user” 表里的 “host”项,从”localhost”改称”%”
在虚拟机/服务器上进入mysql:
use mysql;select host, user from user;update user set host = '%' where user = 'root';flush privileges;service mysql restart
4.2 连接报错2003
- 在windows下,cmd 输入
1 | telnet 192.168.xxx.xxx 3306 |
- 在虚拟机下输入
1 | netstat -anp| grep 3306 |

- 修改
/etc/mysql/mysql.conf.d/mysqld.cnf
需要root权限,sudo passwd root设置root密码, su进入root.
1 | vim /etc/mysql/mysql.conf.d/mysqld.cnf |
把 bind-address = 127.0.0.1 改为 bind-address = 0.0.0.0
上面的意思是改为监听所有地址
- 重启MySQL
1 | service mysql restart |